
What do we mean by bookmarks that are used on the Internet? Just like when you might want to quickly find your place in a book or among printed documents and you use a bookmark or sticky tab, adding online bookmarks can help you quickly re-find important content. That’s right, you will no longer need to type in the website address and drill down to a specific page on the site each time you want to check a frequently-visited page.
As Chrome ![]() is by far the most used web browser in the world (vs Internet Explorer, Firefox, etc), in this post we will take you through how to bookmark pages using Chrome. Bookmarking while using Apple (iPad/iPhone) or Android phones use a similar process and if you let us know you would find it useful, we can detail those in a future post.
is by far the most used web browser in the world (vs Internet Explorer, Firefox, etc), in this post we will take you through how to bookmark pages using Chrome. Bookmarking while using Apple (iPad/iPhone) or Android phones use a similar process and if you let us know you would find it useful, we can detail those in a future post.
Adding a Bookmark
- On your computer, open Chrome.

- Go to the site that you want to visit again in the future. For example https://gransplain.com/blog/
- To the right of the address bar, click the little star.
 Choose “Add bookmark”. A bookmark will be automatically created.
 - Now a pop-up box will appear where you can customize the bookmark if you wish.

Customizing a bookmark
As you can see in the image above, Chrome sets a default name as the webpage address. If you want to simplify to something more memorable you can easily do so by highlighting the name (it may already be highlighted as in the image above) and simply typing in what you’d like to name it.

For example, if you’ve found a good online article about the best pizza in your town, and you’d like to easily re-find it, you may want to re-name the page from “Time Out – Cheesiest Pizzas Revealed” to “Best Pizza”. It will be a whole lot easier to find once you have a longer collection of bookmarked pages if you can see the word “Pizza” right off the bat.
You will also be prompted to choose a Folder in which to save the bookmark. You can keep things simple and use the default “Bookmarks bar”. If instead you envision creating a number of bookmarks and enjoy keeping things neatly filed, then you might want to create folders and file accordingly. For example the pizza article could be filed under a folder you call “Food & Drink”, where you can later add articles on a new coffee shop, etc.
Finding a previously created bookmark
- On your computer, open Chrome.
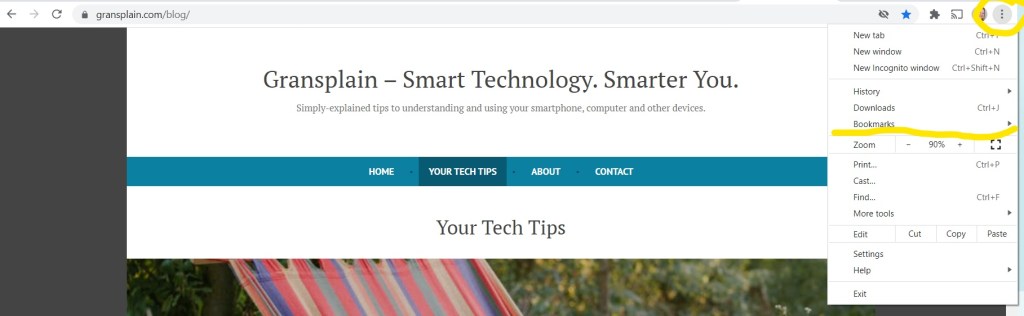
- At the top right, click More (the three dots), then in drop-down menu, choose Bookmarks. (see image below)
- Choosing Bookmarks will open a new list of all the bookmarks you’ve created so far. Find and click the bookmark you want.
Deleting a Bookmark
Important: Once you’ve deleted a bookmark, you can’t get it back. You would have to create it from scratch. (Not the end of the world, but a bit more hassle than taking a moment to make sure you are deleting the bookmark you’d intended.) However, sometimes you only need a bookmark for a specific use, and once that’s finished, you may want to clear it off your computer just as you’d want to take off sticky tabs from printed material once their purpose had been served.
- On your computer, open Chrome.
- At the top right, click the More icon (the 3 vertical dots)
 , then “Bookmarks”, then “Bookmark manager”.
 - To the right of a bookmark you want to delete, click the down arrow
 and then choose “Delete”.
Now you know the basics for creating, customizing, finding and deleting bookmarks using your computer. Let us know in the comments if you’d like a future posts on how to do the same using an iPhone, iPad or Android phone. You can also hit the “Like” ![]() button below to let us know you have found this helpful and we create similar articles in future.
button below to let us know you have found this helpful and we create similar articles in future.
If you’d like to automatically receive our new tech tip each week directly into your inbox, please subscribe by inputting your email address in the box below. We promise never to share your details with anyone without your express permission.

One thought on “How to Add, Customize, Find and Delete Bookmarks for Your Frequently Used Web Pages”