
Whether you’re looking to simply crop photos or apply more creative special effects, you’ll find editing pictures on your iPhone is easier than you may have imagined. Let’s review two basics here.
How to Crop Images on Your iPhone
Select the photo or other image you’d like to crop by going into your picture files ![]() and selecting the photo. You can go straight into editing this image, but if you’re like me, you may prefer to proceed with an abundance of caution and copy the image first in order to retain the original “just in case” because once you hit “Done”, you’re stuck with the amended image.
and selecting the photo. You can go straight into editing this image, but if you’re like me, you may prefer to proceed with an abundance of caution and copy the image first in order to retain the original “just in case” because once you hit “Done”, you’re stuck with the amended image.
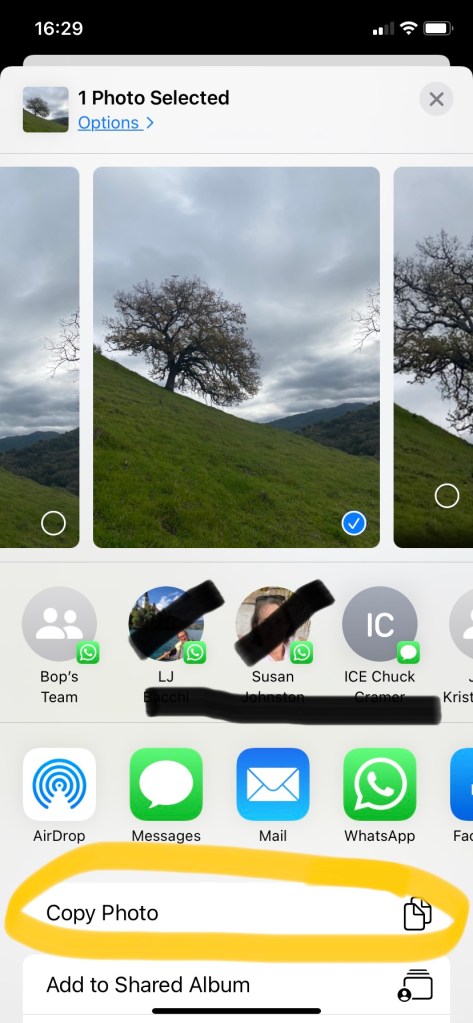
If you’d like to retain the original and have a go on a copy, select the “upload” button  and choose “Copy Photo” (see below, names blotted out to protect my innocent frequent contacts). Now you can carry on with changes on the open picture.
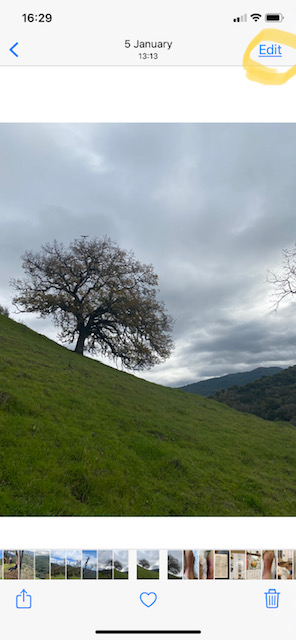
Choose “Edit” (see below, left, circled). This will open up a number of options from magic wands to ying & yang icons. For now we’ll concentrate on cropping, so choose the crop icon (circled, below right).

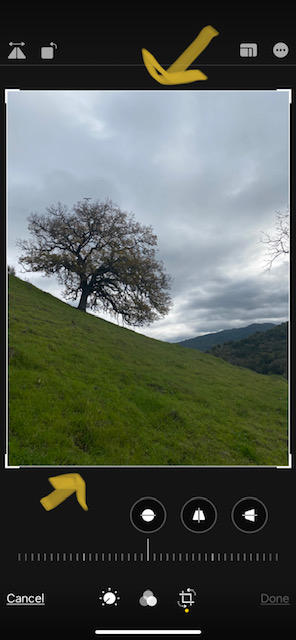
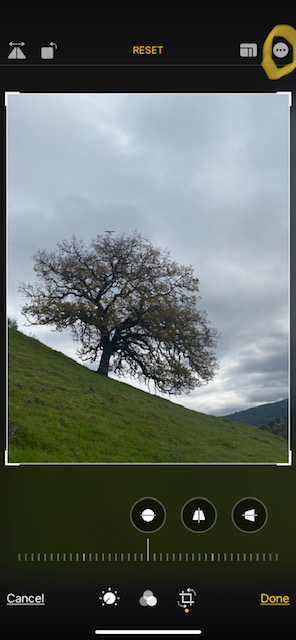
Tapping the crop symbol will add moveable borders to all edges and corners of your image (see below, with arrows top and bottom). Simply slide the desired border or corner with a finger until you achieve the desired crop. Don’t worry, at this stage you can simply move it again if you didn’t get it right the first try. For this demonstration we’ll cut out the branches of the tree on the right as well as some of the grassy area.
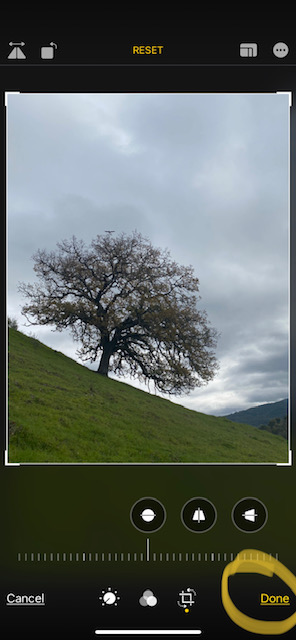
Once you’re happy with the cropping, you can tap “Done”. If cropping is the only change you’d like to make, you truly are done, and when you view, access or share the photo, it will be the cropped version. If, however, you have a change of heart, instead of “Done”, you can start over by choosing “Reset” highlighted in yellow text at the top of your screen. See below.
How to Add Hand-Written Text to Your Image
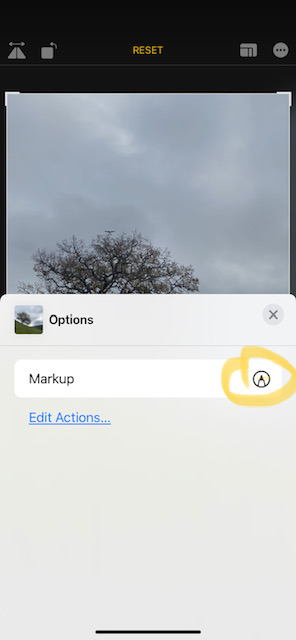
In addition to or instead of cropping, you may want to make other adjustments to your image. Here, we’ll look at adding text, and we’ll show you other edits in a later post (so be sure to subscribe at the end of this post so as not to miss those). To add text, choose the ellipsis (three dots) in the top right corner when in Edit mode (see below left, circled). This will bring up the (for now, only) option called “Markup”, see below right.
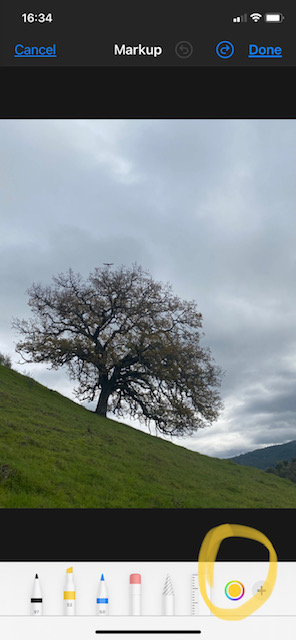
Once you tap “Markup” a set of pen and eraser options will appear at the bottom of your screen (below, left). The default one will be shown as raised slightly above the other options. To change the option, simply tap a different one. Tapping the one already raised will instead bring up options in terms of thickness/intensity of that chosen marker. To change the color of the chosen marker, tap the color circle (see below, right).

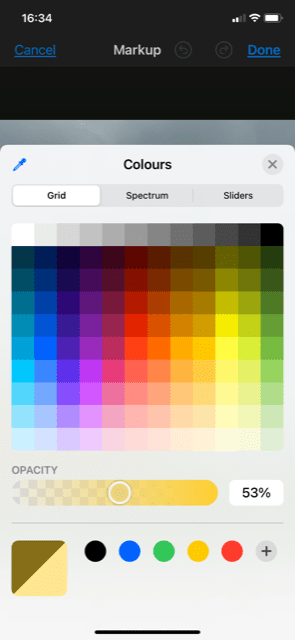
This will bring up a lovely palette of color choices from which to choose (below, left). Once you’ve made your choice (we love purple!), that color will appear both on the pen nib as well as in the circle (below, right).

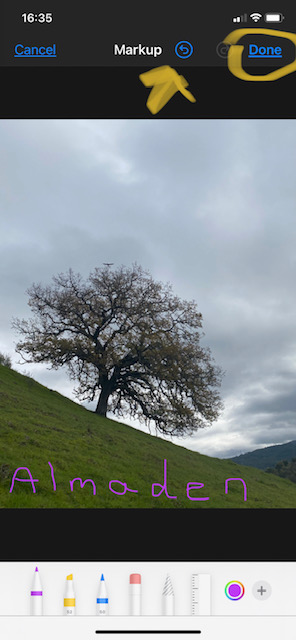
To add hand-written text, simply start writing using your finger or a stylus. You can undo (inevitable) mistakes by tapping the “undo or back-up” button once or multiple times in succession (see yellow arrow below). Once you’re happy, hit “Done” (circled below).
Adding Typed Text to Images on iPhone
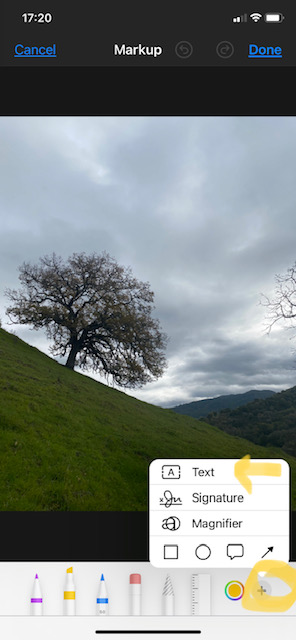
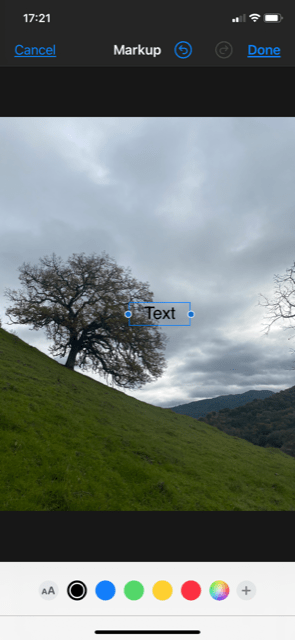
If you find it frustrating to try to write neatly with a finger or stylus, the ability to add typed text is just another tap away! Next to the circle indicating which color is selected, you’ll find a “+” in another circle. Tap this to bring up a menu and choose “Text” option (see below, left). This will add a default small text box in the middle of the image that says, well, “Text” (below, right).
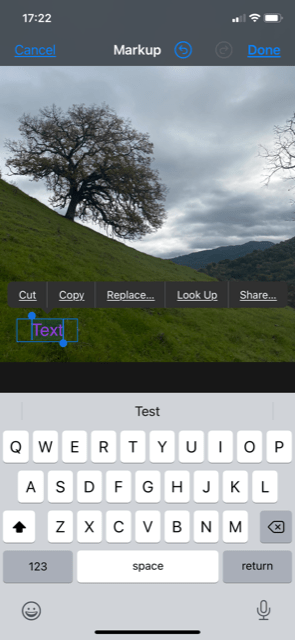
Now you can easily move and edit this text box. I prefer to move it first so that I can then choose a color and font size accordingly. To select a color, tap the palette (circled, below left). Guess which color we chose? That’s right, still purple! Presuming your desired message is not “Text”, tap the word to bring up the edit menu (see below, right).


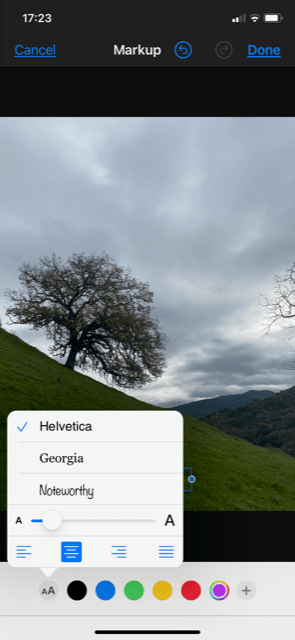
This will bring up a keyboard below the image (see below, left). Type in your desired text. Next, choose your desired size font by tapping the circle with two “A’s” (below, right), and slide your finger along the scale. Here you can also change the font and centering. Don’t worry about the text being too big for the current sized text box as we’ll adjust that next.
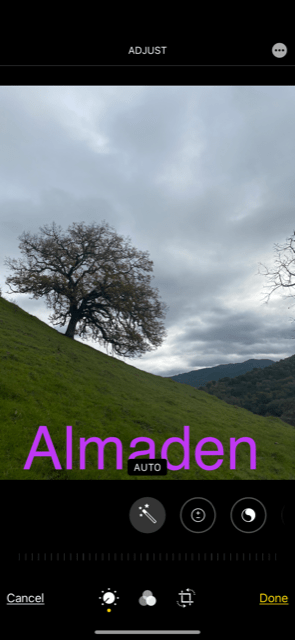
To adjust the size of the text box to accommodate a larger chosen font, simply drag the edge out until it fits in the number of lines desired. See our finished product below. Tap the “Done” button at bottom right of screen. And now your edited image is saved and ready to share. If you need a refresher how to share images by text or other messaging app, see our recent post here. Or if you’re looking instead to attach your masterpiece to an email, you can find those easy instructions here.
Curious what those other Edit symbols do? Be sure to subscribe (for free) to Gransplain so as not to miss future posts on other useful and fun edits you can make to your iPhone photos.
If you know anyone who might benefit from these tips, be sure to share with them. You can do this by double-clicking the web address bar at the top of your screen, then right clicking to select “Save” then going to an email or text message and right clicking again to “Paste”. Then hit “Send”.
