
How to attach a photo from a smartphone is one of the questions I get asked most frequently. Luckily it’s also one of the easiest things to learn! There are two ways to do this wholly from your iPhone, and the difference will depend which starting point you prefer. We’ll cover both.
Starting from the Photo
You can start the process by bringing up the photo itself. You can do so either by choosing the photo you just shot or by going into your photo library ![]() to find the photo you want to share. Sharing by starting with choosing the photo is the easier option when the photo has just been taken and it’s already on your screen or when it may be buried a bit deeply in a large photo library. In this case you can more quickly scroll through photos as they are shown in gallery format rather than one by one.
to find the photo you want to share. Sharing by starting with choosing the photo is the easier option when the photo has just been taken and it’s already on your screen or when it may be buried a bit deeply in a large photo library. In this case you can more quickly scroll through photos as they are shown in gallery format rather than one by one.
Tap on one single photo or video you’d like to share. In the lower left corner, you’ll now see the share button.  If you are looking to share more than one photo at once, you must still select “share” as a first step.
Choosing “Share” will bring up a number of popular options. You will also see a blue tick mark in the lower corner of the photo you’ve chosen. This is your confirmation that this photo has been chosen (see yellow underline in image below).
If you do want to share more than one photo or video at once, you should choose the other desired ones now before selecting email as your desired vehicle for sharing. You can do this by swiping / scrolling right and/or left. (If the photo you’ve chosen is the most recent one you have on your photo roll, you will only be able to scroll left.) Choose any additional photos by tapping on them; you will see the tick mark added to the corner. If you change your mind and want to de-select one or more pictures, simply tap again and you will see the tick mark disappear on that photo. Now choose “Mail” (see yellow circle in image below).

Tapping “Mail” will now bring up a new blank message with the photo(s) you’ve chosen already attached (see image below). Simply address the email, add any written message and hit “send” as usual.
Starting with an existing email
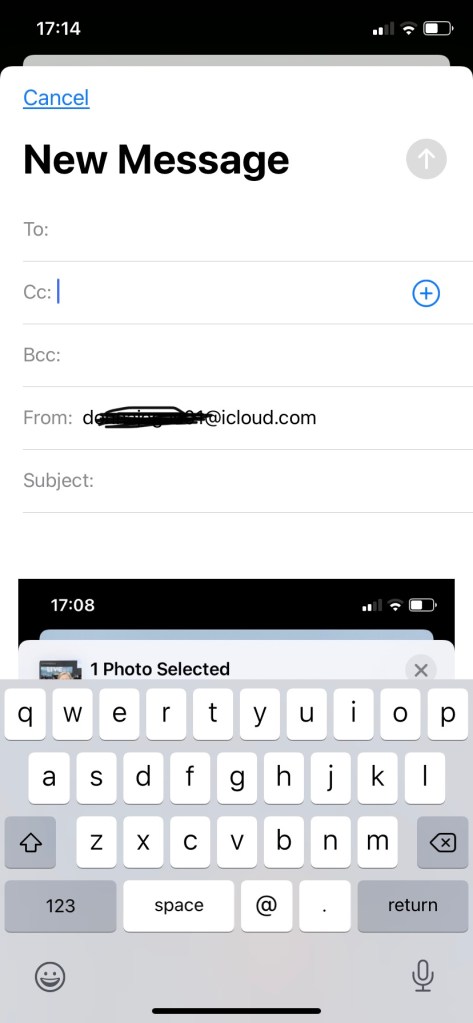
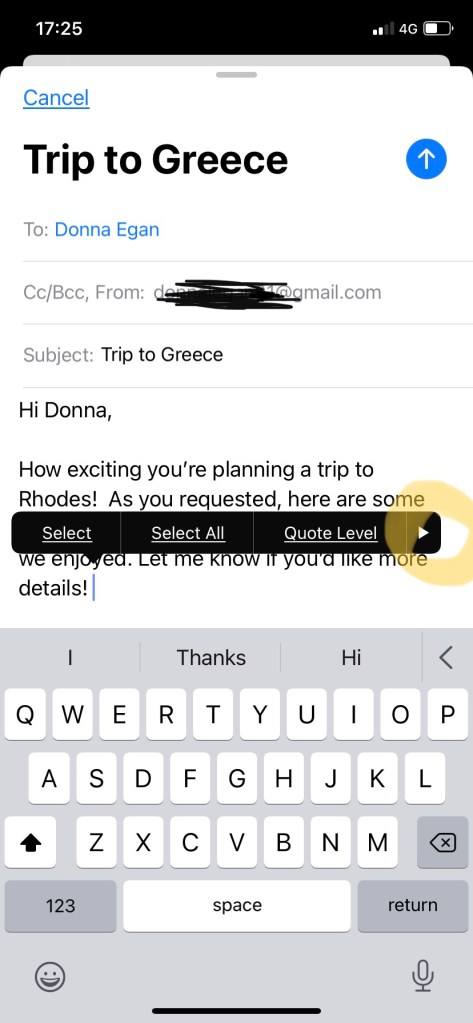
That’s all fine and good….until you find you want to add one or more photos or videos to an existing email. Perhaps it’s part of a chain and you don’t want to separate the pictures from the history of the conversation. In this case, you will be embedding the photo(s) into the body of your email. Start or continue your email as usual. Once you are ready, tap on the spot where you’d like your photo to appear ie in the body of the text or perhaps at the bottom of your email. A black menu bar will appear with several options shown (see image below, left).
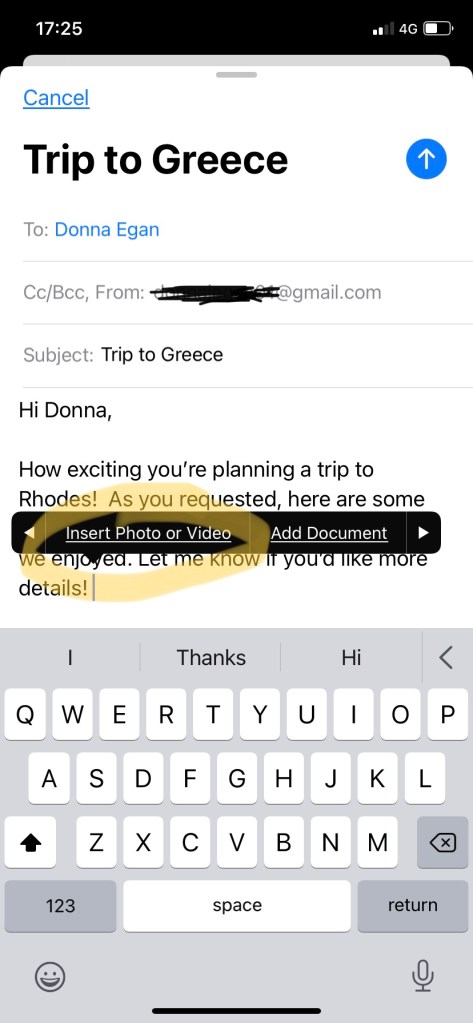
You will need to scroll using the arrow on the right of the options (circled below, left) in order to select “Insert photo or video” (see this circled in image below, right).
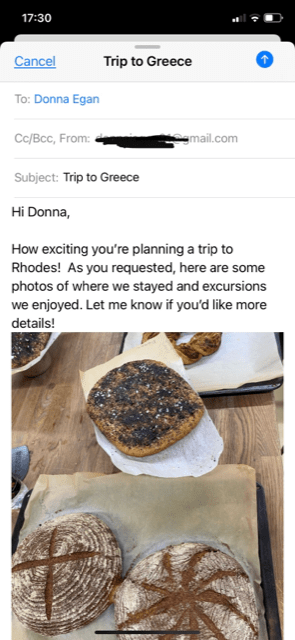
Once you tap “Insert Photo or Video”, your picture library will appear at the bottom of your screen (see below, left). Tap one or more images you’d like to insert and they will appear where in the email you had selected (see below, right). If you want the pictures to appear in different areas, say you are writing a description, inserting the corresponding picture then writing a separate description before you want an additional picture, then you will need to repeat the above process each time. (Or you can cut and paste the text afterward, but this can be fiddly on a small smartphone screen.)

Which size photos should I send?
Once you have selected your pictures, you may have noticed you were prompted to choose the size (Small, Medium, Large). This corresponds to the file size rather than the dimensions as they will appear in your email. A “larger” file size will give more pixels and therefore greater clarity but it will also “weigh down” your email (a larger file may take longer to receive) as well as your recipients’ storage space. Unless you are sending a photo that needs to be professional finish ie to be enlarged or for display printing, you should be fine choosing small or medium. This is also the case where the photo is destined just to be appreciated on the screen either staying in the email or shared on social media.
Now that you’re a pro at inserting photos and videos into an email, don’t deprive your friends and family of seeing your best shots. Why not have a try now?
Thanks for reading. Let us know what you thought above, ![]() and if you’d like our future posts to come directly to your inbox, simply input your email address into box below and hit “Subscribe”. It’s free and we promise to keep your details between us.
and if you’d like our future posts to come directly to your inbox, simply input your email address into box below and hit “Subscribe”. It’s free and we promise to keep your details between us.

2 thoughts on “How to Attach a Photo from your iPhone into an Email”