
Like all forms of social media, Facebook (“FB”) can be a really good thing as much as it can be an unhealthy thing. On the positive side, it’s one of the easiest ways to stay connected to your friends and family. Due to their busy schedules, many people prefer to give regular quick updates, usually with pictures! So you can benefit from more and more frequent updates on your great nieces and nephews, lifelong friends on their travels, cute family pets and more.
Of course, you may have to wade through some artfully styled but still boring pictures of chile con carne or lemon sole with sugar snap peas, but the good news is that over time Facebook’s algorithm (computer programming) will show you more of what you interact with and less of the ones you don’t appreciate so much. More on that later. First if you don’t already have an account, here’s how you get started in a few easy steps. And if you’re already a firm fan of FB but know someone with whom you’d like to connect but they need help getting started, why not share this post with them?
How to create a Facebook personal account:
- Go to facebook.com/reg
- Enter the name you go by in everyday life. Unlike when you set up a new email address, you do not need to keep searching until you find an unused name (eg “SusanJonesTheDragon5521@gmail.com”). “Susan Jones” will do.
- Enter your email or mobile phone number. Double check you’ve typed it correctly before going to the next step because this is how you are going to link that name to you and not the other Susan Jones in Timbuktu.
- Select your gender and date of birth, and choose a password.
- Write down the password!! OK, this isn’t part of the official instructions, but I’m telling you as a friend who wants to save you lots of frustration later when you forget what you swore you’d never forget… Either do this where you keep other passwords or start a new entry on the Notes app that comes standard with your smartphone. (Later if you forget, you can go to Notes and type in “Facebook” in the search bar and the note where you wrote “Facebook pw”, or similar, will come up!)
- Tap “Sign Up”.
- To finish creating your account, you still just need to confirm your email or mobile phone number. You should not close the Facebook tab in order to open your email. Simply go to the other tab where your email is already open or open a new tab in order to open your email without closing FB. If you need a refresher how to open new tabs in Chrome, you’ll find that on an earlier post here. Open the email from FB and tap the button/link to confirm it’s really you/your email. And voila!
Keeping Control of Who Sees Your Posts
Notice I put this step right after opening your account rather than as a footnote. Why? Because you want to share your news and photos with your friends and family and not with random strangers or worse, scam artists. So do yourself a favor and set your security controls now.
Here’s how when using a computer:
- On any Facebook page, click the
 (down arrow) or ellipsis (three horizontal dots) at the top right of the screen and select “Settings” or “Profile and Tagging Settings” then choose your desired “Privacy” setting on the left side of the screen.
 - In the “Your Activity” section, find “Who can see your future posts?” and click on “Edit”. See image below.
- Use the drop-down menu to choose who can see your posts: the public (in other words, everyone), just your Facebook friends, some of your Facebook friends should see them or not see them (you can choose who), or just you (although why keep these to yourself?). Keep in mind that you can also change this setting for any individual post by looking for the “News Feed” line just below the “Create Post” box and clicking on the drop-down menu. I tend to keep my life simple and allow only friends (not the general public) to see any of my posts. I’ve never hidden posts from certain friends, but I could see how that could come in handy if you use FB to plan a surprise for someone with other friends.
- Some advanced stuff: this is also the place where you can review each of the posts you’ve been tagged in (“named and shamed”) by other people, and choose whether to hide them. You can also go back in time to limit past posts so that they can now only be seen by friends.

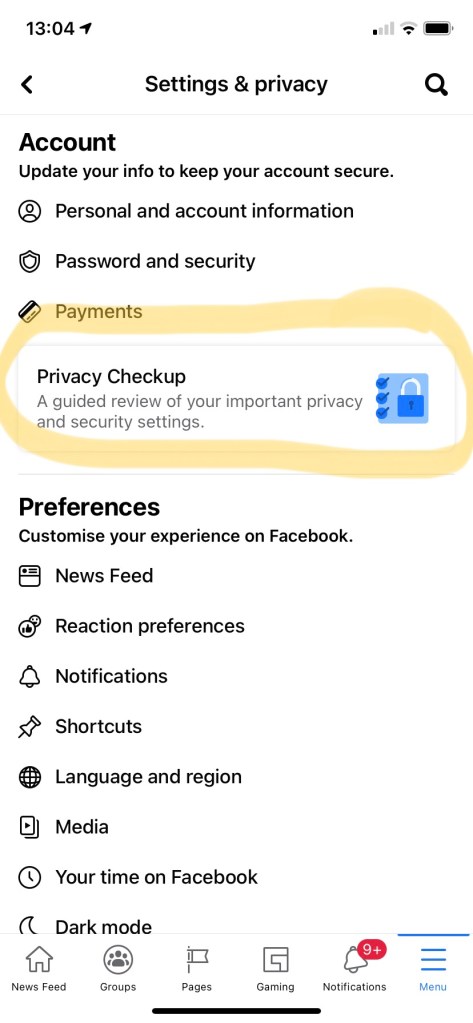
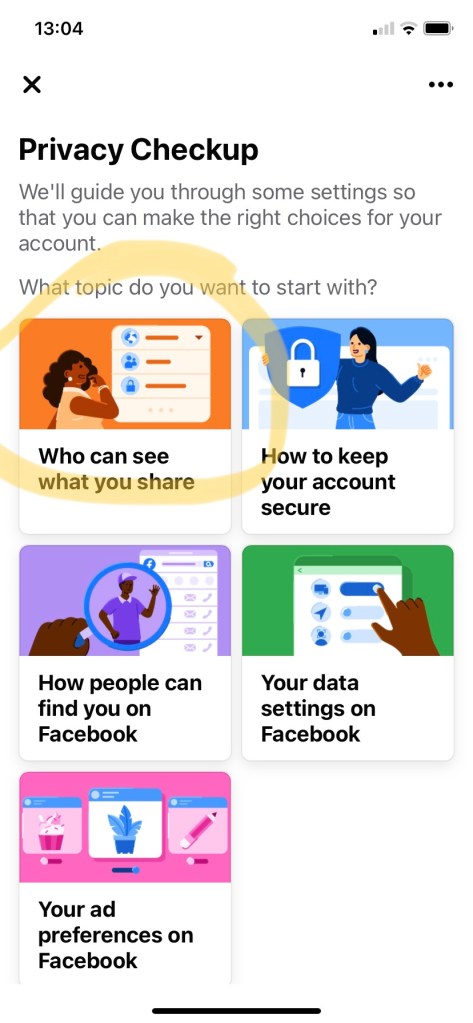
Here’s how when using your smartphone or tablet:
- On any Facebook page, find the settings icon
 . If you don’t see it, tap the ellipsis (three dots) on the lower right of the screen (on an iPhone) or the upper right (on an Android).
 - You can make the same choices as above. See below the screenshots of what this looks like on iPhone:

How to Find Friends
It’s easy to get started. Go to News feed and in the top left corner you should see “Search Facebook”. See image below.

Type in the names of your friends or family members (one at a time), using their everyday name. Some women include their maiden and married names in order to be more easily found, so if they have a less common maiden name, try that first. As FB is so popular, unless the person’s everyday name is very original, you will likely get several search results to look through.
To their credit, FB helps by showing you matches they think will be more likely to be the person you’re looking for based on both your profiles, including location. Once you have added a number of friends, if the person you’re looking to now add is friends with someone you’re friends with, FB will show their profile first. Much easier. If your eyes work better than mine maybe you can tell just from the tiny profile picture shown, great!
Otherwise you may have to do a little sleuthing and open the profiles one by one to look at their “About” information and/or recent photos to be sure you’re about to invite the right person to connect with you. For everyone’s security, FB won’t automatically connect you once you find the friend you’re looking for. Instead they will send that person a “Friend Request” that they can then approve or ignore. Be patient as not everyone checks their FB notifications frequently. I’ve had requests approved even months after sending them.
Likewise be sure to check your notifications when you log onto FB as the algorithm (computer program) will start to “suggest” you as a potential connection to people in your network (friends in common, same high school and graduation year, etc.), and they may send you a request to approve (or ignore, if it’s someone who was annoying then and probably still is today…)
Basics to Start Posting
Whether accessing FB on your smartphone or computer, right under your profile picture, you should see a box that says “What’s on your mind?” This is where you can start a new post with words, picture(s) or both. If you do not see that box, go to the News Feed – look for the house icon, and it should then be at the top of the screen. In future Gransplain blogposts, we’ll provide more tips on how to engage people with your posts (where they react and comment), but for now why not try out a few posts and see how you get on?
Troubleshooting (Just in Case….)
Here are some links to Facebook’s Help Center if you’re having problems logging in:
- If you’re having trouble with your password, learn how to reset your password.
- If you still can’t log in, find out what to do next.
If you found this useful, please let us know with a “thumbs up”. And if you’d like to get future posts on using Facebook and other ways to get the most out of the tech you already own, be sure to subscribe for free by adding your email address and hitting “Subscribe”.
